Learn how to clean a faucet head with these step-by-step guides designed to help keep your bathroom and kitchen sinks looking like new.
Are your faucet heads looking a little tired and dull? If you're in the market to give them a deep clean and restore your sink's sparkle, then this guide is for you! We'll take you through how to clean a faucet head successfully - from quick, easy hacks to chemical-free solutions. With our these tips and step-by-step guides, it doesn't have to be a challenge to maintain an attractive bathroom or kitchen sink! So, let's dive in and get your faucet looking its best!
How to Clean a Faucet Head: Materials
To clean a faucet head, you will need a few basic materials. With these in hand, you'll be well-equipped to tackle even the toughest grime and leave your kitchen faucet heads and bathroom sink faucets looking like new.
Dish Soap
Small Bucket
White Vinegar
Baking soda
Toothpaste
Lemon Juice
WD40
CLR (Calcium Limescale & Rust Remover)
Scrub Brush or Toothbrush
Pliers
Towel
With these materials, you can do some thorough faucet cleaning. Now, let’s dive into how to use these items to clean your faucets effectively.
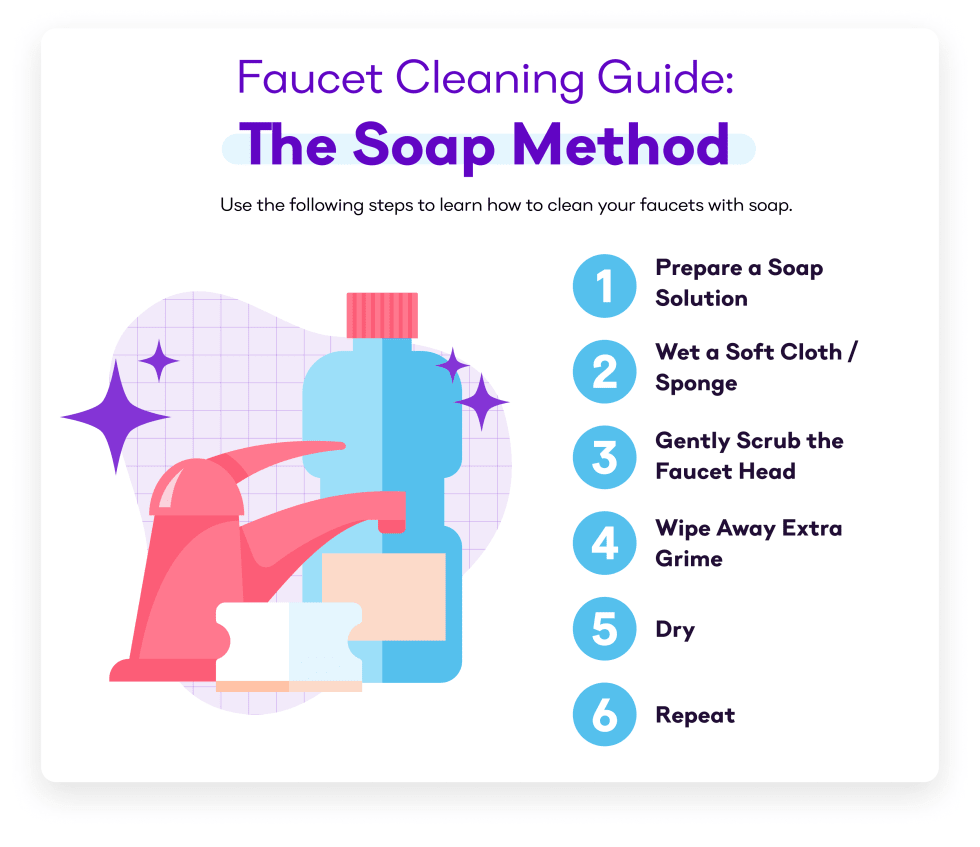
How to Clean a Faucet Head with Soap
Keeping your faucet head clean is essential for maintaining a clean apartment. The soap and water method is simple and effective for cleaning a faucet head. Here are the steps you can use to get the job done:
Prepare a Soap Solution: Mix a few drops of dish soap in a bucket of warm water.
Wet a Soft Cloth or Sponge: Grab a soft cloth or sponge and soak it in your soap solution, wringing out any excess water.
Gently Scrub the Faucet Head: Lightly clean it with your soap-covered cloth or sponge, paying extra attention to areas with grime buildup.
Wipe Away Extra Grime: Use the damp cloth or sponge to wipe away any loosened grime, removing any remaining soap residue.
Dry: Use a soft cloth to dry your faucet head or let it air dry.
Repeat: Redo this process, if necessary, until the faucet head is clean and shiny.
Following these steps, you can easily clean your faucet head with soap and water, keeping it looking new. If cleaning your faucet head with soap isn’t working effectively, keep reading to learn other tips on how to clean a faucet.
How to Clean a Faucet Head with Steam
Cleaning a faucet head with steam is an efficient and eco-friendly method for removing tough grime and mineral buildup. By using the power of steam, you can sanitize and descale your faucet head, leaving it looking like new. This method is great for faucets made of materials that are prone to discoloration or damage from chemical cleaners, such as brushed nickel or nickel-plated faucets. Here are the steps on how to clean a faucet head with steam:
Fill Your Kettle Pot: Fill a kettle or pot with water and bring it to a boil.
Steam The Faucet: Hold the steam nozzle or spout of the kettle or pot over the faucet head, directing the steam towards the areas with grime buildup.
Hold the Steam Steady: Let the steam work for a few minutes, loosening the grime and mineral buildup.
Scrub: Gently scrub the faucet head with a soft cloth or sponge, wiping away the loosened grime and minerals.
Rinse: Run warm water from the faucet and use it to remove any remaining residue.
Dry: You can dry the faucet head with a soft cloth or let it air dry.
With this steaming method, you can avoid using harsh chemicals or excessive water. Keep reading to learn how to clean faucets with vinegar.
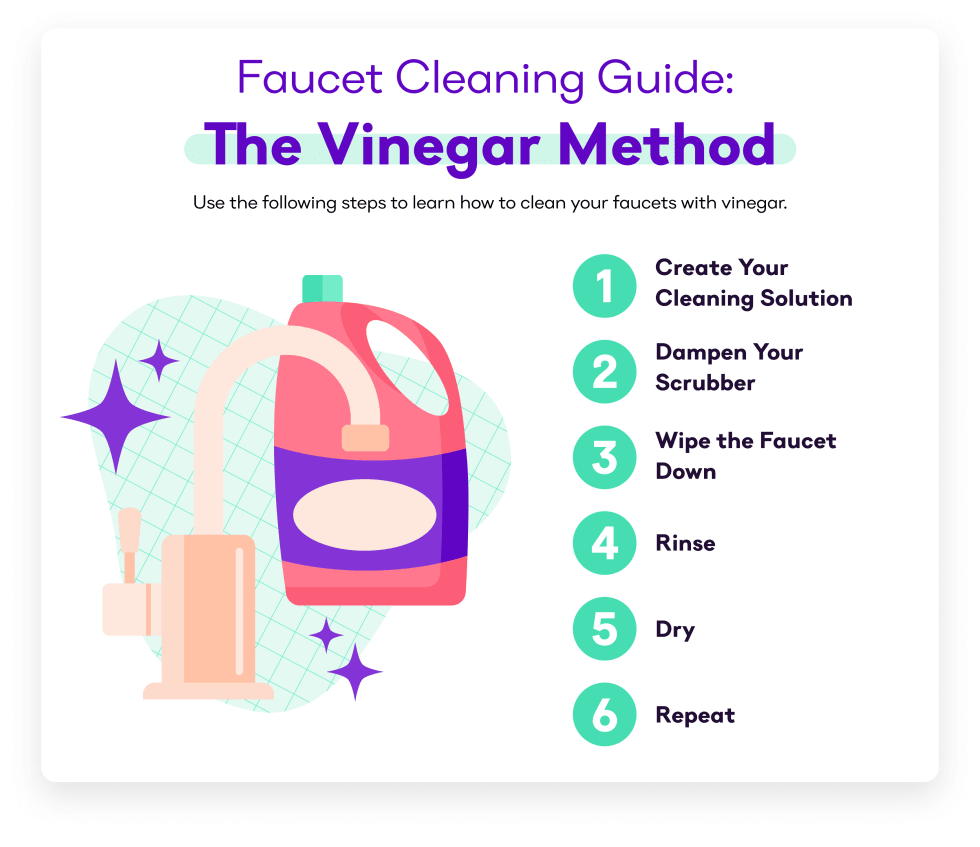
How to Clean a Faucet Head with Vinegar
Cleaning faucets with vinegar is a natural home remedy. Vinegar’s acidic properties can help to dissolve mineral buildup and grime, leaving your faucet head sparkling clean. Here's a step-by-step guide on cleaning faucets or cleaning shower heads with vinegar:
Create Your Cleaning Solution: Fill a bowl with equal water and white vinegar.
Dampen Your Scrubber: Soak a soft cloth or sponge in the vinegar solution. Then, wring out the cloth or sponge so that it is damp but not soaking wet.
Wipe the Faucet Down: Use the cloth or sponge to wipe down the faucet head, paying extra attention to areas with grime buildup.
Rinse: After letting the vinegar solution sit on the faucet head for 10-15 minutes, rinse the faucet head thoroughly with warm water to remove any remaining vinegar residue.
Dry: You can dry the faucet head with a soft cloth or let it air dry.
Cleaning faucets with vinegar is a simple and affordable method that can help keep your faucets looking new and shiny.
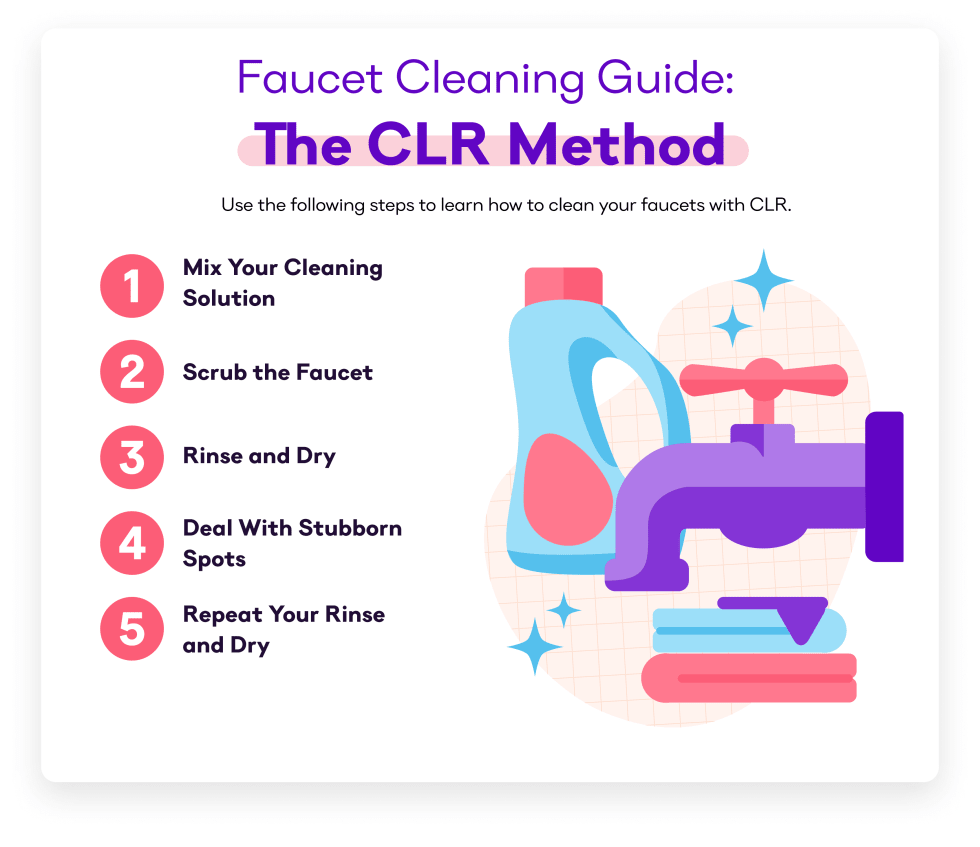
How to Clean a Faucet Head with CLR
Using CLR (Calcium Lime Rust) to clean a faucet head helps rid your sink or bath of limescale and calcium build-up, two of the most common causes of a clogged faucet. CLR is a powerful cleaner that can break up mineral deposits and residue without damaging the metal components of your faucet. Follow these steps to learn how to clean a faucet with CLR:
Prep Your Cleaning Materials: Put on rubber gloves and place a cloth or rag on the countertop beneath the faucet head.
Wipe Down the Faucet Head: Pour some CLR onto a sponge or soft cloth and blot it on the faucet head. Make sure to get into all the crevices and grooves in its design.
Scrub with a Soft Bristled Brush: Allow the CLR cleaner to sit on the fixture for 10 minutes before scrubbing off any deposits with a soft-bristled brush.
Rinse Away the CLR: Rinse off any remaining CLR residue with warm water. Next, use a cloth or paper towel to dry off the faucet head completely.
Repeat: For further cleaning, repeat steps 2-4 as necessary until all buildup is removed from the fixture.
If you don’t have CLR on hand, another option to clean a faucet head effectively is to use baking soda.
How to Clean a Faucet Head with Baking Soda
Cleaning a faucet head with baking soda is another way to get rid of dirt and grime. Baking soda can help to dissolve grease and lime deposits, which can make taps look old and discolored.
Mix Your Cleaning Solution: Begin by mixing one tablespoon of baking soda into a cup of warm water. Stir the mixture until it has fully dissolved.
Scrub The Faucet: Dip your cloth or brush into the solution and scrub away any residue from the faucet’s surface. Do this for several minutes until all debris has been removed.
Rinse and Dry: With warm water, rinse of the solution and dry off the faucet with a dry cloth.
Deal With Stubborn Spots: If there are still spots or discolorations on the faucet’s surface, use a paste made from equal parts of baking soda and vinegar to gently scrub them away from the surface of your faucet. Make sure you don’t scrub too hard, as this could damage the finish on your sink or countertop.
Repeat Your Rinse and Dry: Rinse away all residue and dry it thoroughly with a soft cloth before returning it back in place!
Sometimes the toughest of stains and clogs will require a more powerful cleaner. Keep reading to learn how to unclog faucets with CLR.
How to Remove a Faucet Head
Removing a faucet head may be necessary for a deeper cleaning of your faucet head. The following steps outline the process to remove sink faucets:
Shut Off The Water Supply to the Faucet: This can be done by turning off the valves under the sink or shutting off the main water supply to the house.
Remove the Handle: Use a pair of adjustable pliers or a wrench to loosen and remove the handle of the faucet.
Loosen the Nut: Locate the nut that holds the faucet head in place and use a wrench or pliers to loosen it. Once the nut is loose, gently pull the faucet head off the supply pipe.
Ensure Your Faucet Head Is Tight: Clean the threads on the supply pipe and the inside of the faucet head to ensure a tight, leak-free connection when reassembling.
Note: The specific steps may vary depending on the type and brand of faucet you have, so it's always a good idea to consult the manufacturer's instructions for your specific sink nozzle.
How to Clean a Clogged Faucet Aerator
A clogged faucet aerator can decrease water flow and reduce the overall performance of your faucet. Keep reading to learn the best steps on how to clean a faucet aerator.
What You’ll Need
Unclogging a faucet aerator is a quick and easy task that can be done with just a few common household items.
Small brush or toothbrush
White vinegar
A needle or straight pin
Instructions
Unclogging a faucet aerator is a simple task that can restore the flow of water from your faucet. Follow these instructions to unclog your faucet aerator.
Remove the Aerator: To start, remove the aerator from the end of the faucet by twisting it counterclockwise.
Check for Debris and Mineral Deposits: Check your aerator for buildups and mineral deposits. Depending on how old the faucet is, it may have a lot, or not much at all.
Disassemble and Clean: Using a small brush or toothbrush, clean any debris or buildup from the screen inside the aerator.
4. Soak Parts in CLR or Vinegar: Soak the aerator in an equal mixture of white vinegar and water for about 30 minutes to remove any mineral buildup. If you have CLR on hand, you can use that instead.
Rinse and Reassemble: After letting the aerator soak, If the clog is still present, use a needle or straight pin to clear any small clogs in the screen. Finally, reattach the aerator to the faucet by twisting it clockwise.
Note: Sometimes an aerator may be so clogged that you may have to end up replacing it, if you are unable to clean in.
Final Thoughts
Regularly cleaning and maintaining your faucet head and aerator is an essential task that can improve its overall performance. In this guide, we have detailed how to clean a faucet head and provided tips to keep your faucet functioning efficiently and help prevent water waste.
By following these steps and making faucet cleaning a regular part of your cleaning routine, you can ensure that your faucet remains in top condition. So, don't let a dirty faucet be a source of frustration - learn how to clean a faucet and enjoy a sparkling, efficient sink!
Faucet Cleaning FAQs
How Often Should You Clean a Faucet Head?
It is recommended to clean a faucet head at least once every six months to a year, as regular cleaning can help prevent build-up of mineral deposits.
Why Do You Need to Clean a Faucet Head?
You need to clean a faucet head regularly to minimize mineral deposits and other debris that accumulate and clog the aerator, reducing water flow and causing leaks.
How Long Should You Soak a Faucet in Vinegar?
Generally, you should soak a faucet in vinegar for 30 minutes to an hour to remove most mineral deposits, though the length of time depends on the severity of the mineral buildup and debris.
Can You Spray WD40 Up a Faucet?
Yes, you can spray WD-40 up a faucet, but it may not be the best solution for cleaning a clogged faucet aerator, as this petroleum-based product is primarily designed as a lubricant and rust inhibitor.
While it may help to loosen some mineral buildup and debris, it is not specifically designed for cleaning faucets and could potentially harm certain faucet components.
Tristian Brown is a Senior Content Marketing Associate at Apartment List, where he manages high-quality content that helps modern renters find the perfect home. He brings an immense wealth of knowledge to the team, having earned a Bachelor of Arts in Marketing and European Management from the University of San Diego and EM Strasbourg Business School. Read More
Susan is an accomplished freelance writer whose passion for rental real estate, travel, and digital marketing has been the driving force behind her nearly 15-year career. Throughout her professional journey, Susan has become a seasoned veteran in creating compelling and informative content focused on the tenant/landlord relationship. Read More